阿里云安装Learning Locker
近期,在阿里云ECs上安装了Learning Locker系统,其间的整个安装过程并非一帆风顺,在此将其进行整理和记录。
一、基本环境
硬件:双核,4G,60G硬盘的虚拟主机
软件:因为以前用CentOS成功安装过,所以这次一开始使用的是CentOS7。不过由于当前官方首推Ubunutu,所以就更换成Ubuntu 20。
二、软件介绍
Learning Locker是一个开源的学习行为数据记录数据库,官方网站是:learninglocker.net。大致介绍如下:
Learning Locker is a conformant open source Learning Record Store (LRS) started in 2013 by HT2 Labs (now Learning Pool); a type of data repository designed to store learning activity statements generated by xAPI (Tin Can) compliant learning activities. This website provides technical documentation for Learning Locker, for anything else please see the main website.
三、安装方法
安装方法有两种:一是借助官方提供的安装脚本(http://docs.learninglocker.net/guides-installing/),二是手工定制安装(http://docs.learninglocker.net/guides-custom-installation/)。由于安装所需的安装包比较多,而且有些安装包还需要指定初始用户配置,所以最安全、最快捷的方式就是第一种。
四、安装过程
(一)登录服务器,切换成root身份,然后执行:
curl -o- -L https://raw.githubusercontent.com/LearningLocker/deploy/master/deployll.sh > deployll.sh && bash deployll.sh
或者
wget -qO deployll.shhttps://raw.githubusercontent.com/LearningLocker/deploy/master/deployll.sh&& bash deployll.sh
此时,会在当前目录下执行deployll.sh这个安装脚本文件。
(二)在安装过程中,首先要安装一系列软件包,此时选择y或默认使用回车即可确认。一路回车下来,会发现在有些软件包哪里将由于下载慢而导致putty连接超时而中断。因此,需要设置putty的connection设置里的(0 to turn off)的值为30。以及服务端SSH配置里加入:ServerAliveInterval=30。
(三)接下来,就会遭遇到一个技术问题:deployll.sh: line 740: nodejs: command not found。详细信息如下:
deployll.sh: line 269: netstat: command not found [LL] We require a path to install to and a path to symlink to. The reason for this is that the script can be re-run in order to update cleanly. The path we'll ask you for is a base path for the releases to be installed to so if you select the default of: /usr/local/learninglocker/releases then we will create a sub-directory under here for every release and symlink the latest install to the final install path (which the nginx config points at. This is so that roll-backs can be done easier and we can perform a complete install before finally switching the nginx config over which'll minimise downtime on upgrades [LL] What base directory do you want to install to? (Press 'enter' for the default of /usr/local/learninglocker/releases) [LL] Directory '/usr/local/learninglocker/releases' doesn't exist - should we create it? [y|n] (Press enter for default of 'y') [LL] What path should the release be symlinked to? (Press enter for the default of /usr/local/learninglocker/current) [LL] I need a user to install the code under - what user would you like me to use? (press enter for the default of 'learninglocker') [LL] User 'learninglocker' doesn't exist - do you want me to create them? [y|n] (enter for default of 'y') [LL] Creating user 'learninglocker'....done! [LL] MongoDB isn't installed - do you want to install it? [y|n] (press 'enter' for default of 'y') [LL] Redis isn't installed - do you want to install it? [y|n] (press 'enter' for default of 'y') [LL] Learning Locker ideally works best with ClamAV (anti virus software) installed but it is not an absolute requirement. Do you want to install it? [y|n] (press 'enter' for the default of 'y') [LL] Installing node version: 10.x deployll.sh: line 740: nodejs: command not found [LL] Something went wrong in installing/updating nodejs. This is likely a fault in your apt config. Can't continue #
国内对此讨论很少,国外也不多,最终在Github的Learning Locker的论坛上找到一个:“https://github.com/LearningLocker/learninglocker/issues/1564”。里面涉及到可能的解决方法,以及在解决问题过程中出现的新问题,实际上看上去着实麻烦。但我这里还算幸运,此时需要编辑脚本文件代码。用vi编辑deployll.sh,定位到740行,可以看到附近有几处“nodejs --version”。问题就在于:“if-statement assumes nodejs executable to be named nodejs - latest installed version v10.23.0 has only executable node”。所以,需要将第一处无法识别的nodejs --version换成node --version即可。
(四)然后,继续做下来又会遇到一个“难问题”——“ fatal: unable to access ‘https://github.com/...’”,即Github无法访问。解决的方法有很多种,比如:https://blog.csdn.net/weixin_45317091/article/details/113409909。我是ping了Github,确认没有连接后,选择添加IP到hosts文件中解决的。
整个操作过程与下述文章基本相同,便不再赘述了:https://blog.csdn.net/u013302168/article/details/120572007。
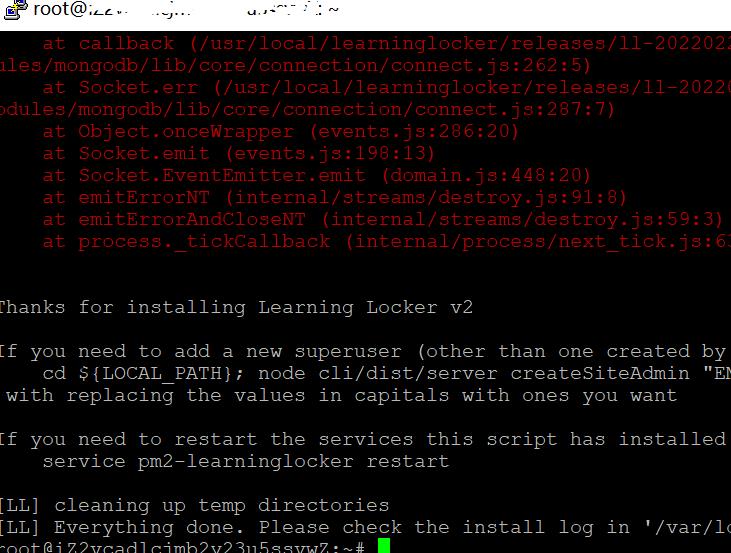
(五)接下来,就能顺利渡过难关,安装完毕:

